-
Posts
76 -
Joined
-
Last visited
Posts posted by JoWyS
-
-
-
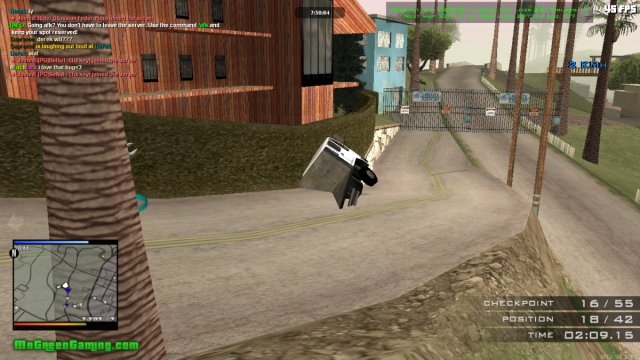
I really hate when the NTS map starts and you can't see your car because there are many players where are you.
And another problem is when the NTS starts, if there are many players connected on the server, you need a BIG PC for not lower fps.
I just ask to fix it. We should can press any key like RTF to hide the other players.
Thanks.
-
--- How to Change The Color of Sky and Water When the Map Begins ---
There are several methods to change the colors, however, I will teach what I think easier
Step 1. Download it: http://www.mediafire.com/download/l368md55f791z58/resources.rar
Step 2. Copy the two files to the folder of your map.
Step 3. Add these lines in your meta.xml
<file src="Actions.xml"></file><script src="ActionScript.lua" type="client"></script>
Step 4. Choose colors.. The colors are in RGB (Red Green Blue) format, then to find these colors, just search on the internet, but I leave a link here for you: http://www.rapidtables.com/web/color/RGB_Color.htm
 screenshot-www rapidtables com 2014-09-06 12-39-41.png
You will need three colors, one for the sky and one for the water.
To "get" the colors, you simply copy the R: G: B:> Like this:
 screenshot-www rapidtables com 2014-09-06 12-43-18.png
My RGB is: 50, 255, 18
Now get more 2 RGBs: 220, 119, 31
80, 255, 255
Then my 3 RGB: 50, 255, 18 > Water
220, 119, 31 > Sky 1
80, 255, 255 > Sky 2
Step 5. Open Actions.xml.
That is in the file:<ActionScript> <Watercolor Visiblemarker="false" trigger="world" AS-ID="1" Color="254,254,254,255" ConditionalNOTHIT="" ConditionalHIT="" Markersize="5" Removeafteruse="false" posX="1" Markercolor="255,255,255,255" posZ="1" Delay="0" posY="1"></Watercolor> <Skycolor Visiblemarker="false" trigger="world" AS-ID="1" Gradient="254,254,254,0,0,0" ConditionalNOTHIT="" ConditionalHIT="" Markersize="5" Removeafteruse="false" posX="2" Markercolor="255,255,255,255" posZ="2" Delay="0" posY="2"></Skycolor></ActionScript>
We have to change the code, very simple:First the Water: Color="254,254,254,255"Blue = Color codeGreen = Transparency (How much less, more transparent, 255 is the max.)Its my changed code:<Watercolor Visiblemarker="false" trigger="world" AS-ID="1" Color="50, 255, 18 ,100" ConditionalNOTHIT="" ConditionalHIT="" Markersize="5" Removeafteruse="false" posX="1" Markercolor="255,255,255,255" posZ="1" Delay="0" posY="1"></Watercolor>
Now the sky.. The sky's gradient, ie, is two colors that change from one to another smoothly!
You can also use just one color, I will show the two forms
We have to do the same thing we do with the water, but now has no transparency
ITS TO GRADIENT:
<Skycolor Visiblemarker="false" trigger="world" AS-ID="1" Gradient="220, 119, 31, 80, 255, 255 " ConditionalNOTHIT="" ConditionalHIT="" Markersize="5" Removeafteruse="false" posX="2" Markercolor="255,255,255,255" posZ="2" Delay="0" posY="2"></Skycolor>
ITS TO UNIQUE COLOR:
<Skycolor Visiblemarker="false" trigger="world" AS-ID="1" Gradient="220, 119, 31" ConditionalNOTHIT="" ConditionalHIT="" Markersize="5" Removeafteruse="false" posX="2" Markercolor="255,255,255,255" posZ="2" Delay="0" posY="2"></Skycolor>
I will use gradient, then its my final code:
<ActionScript> <Watercolor Visiblemarker="false" trigger="world" AS-ID="1" Color="50,255,18,100" ConditionalNOTHIT="" ConditionalHIT="" Markersize="5" Removeafteruse="false" posX="1" Markercolor="255,255,255,255" posZ="1" Delay="0" posY="1"></Watercolor> <Skycolor Visiblemarker="false" trigger="world" AS-ID="1" Gradient="220,119,31,80,255,255" ConditionalNOTHIT="" ConditionalHIT="" Markersize="5" Removeafteruse="false" posX="2" Markercolor="255,255,255,255" posZ="2" Delay="0" posY="2"></Skycolor></ActionScript>
Save your Actions.xml and save
Step 6. Test, test, test, test until you leave it the way you want:
Some prints:
 mta-screen_2014-09-06_13-06-37.png
 mta-screen_2014-09-06_13-06-45.png
 mta-screen_2014-09-06_13-06-50.png
Any questions? Ask!
This link (http://www.mediafire.com/download/l368md55f791z58/resources.rar) isn't the correct files (Actions.xml & ActionScript.lua) for this tutorial.
This is link is your Resources Folder viiNi.
-
--- Bally Model, Flashing lights ----
Download the file: http://www.mediafire.com/download/clldx939g0sh7ju/bally.rar
Step 1. Create a map using ballypllr01_lvs OBJECT ID: 3437
Step 2. After you finish and save your map... go to the map folder, and paste all files of the downloaded file.
Step 3. Add these lines meta.xml:
<file src="b1.dff"></file> <file src="b2.dff"></file> <file src="b1.txd"></file> <file src="b2.txd"></file> <script src="bally_client.lua" type="client"></script>
Step 5. Need to be like that:
<meta> <file src="b1.dff"></file> <file src="b2.dff"></file> <file src="b1.txd"></file> <file src="b2.txd"></file> <script src="bally_client.lua" type="client"></script> <info type="map" version="1.0.0"></info> <map src="vmjgfbvbccbv.map" dimension="0"></map> <settings> <setting name="#skins" value='[ "cj" ]'></setting> <setting name="#time" value="1:0"></setting> <setting name="#maxplayers" value="[ 128 ]"></setting> <setting name="#useLODs" value="[ false ]"></setting> <setting name="#gamespeed" value="[ 1 ]"></setting> <setting name="#ghostmode" value='[ "false" ]'></setting> <setting name="#weather" value="[ 0 ]"></setting> <setting name="#vehicleweapons" value='[ "false" ]'></setting> <setting name="#minplayers" value="[ 0 ]"></setting> <setting name="#respawntime" value="[ 5 ]"></setting> <setting name="#gravity" value="[ 0.0080000004 ]"></setting> <setting name="#waveheight" value="[ 0 ]"></setting> <setting name="#racemode" value='[ "Race\/DD" ]'></setting> <setting name="#locked_time" value="[ true ]"></setting> <setting name="#duration" value="[ 1800 ]"></setting> <setting name="#respawn" value='[ "timelimit" ]'></setting> </settings> <script src="mapEditorScriptingExtension_s.lua" type="server"></script> <script src="mapEditorScriptingExtension_c.lua" type="client" validate="false"></script></meta>
Step 6 . Finished.
Video that shows how it looks:
Fixed, now it works fine!
Note : Go back to the page 1 to see the full tutorial xD
Nope, still don't work.

-
DD-Permanent#1: I reedited again, but i don't know what I can do about the load problem. Help me.
NTS-Pumarun: Fixed.
RTF-Ultimative: Fixed.
NTS-Issues: New map.
-
DD-Permanent 1: Objects will load on the server, i have more DDs with these objects, and it works good, try to upload pls. (I uploaded 1 more map with the same objects).
More maps for MIX server. Thanks Cena.
-
-
CTF- Summit: I reedited this map and it's really different than other, only have the same song and the same name, try to upload it please.
NTS- Addrenalin: I reedited it too, now is really shorter ( -10 checkpoints ).
RTF- Samethenever = NTS- Never the same? ( I passed the NTS at RTF ).
Thanks KaliBwoy.
-
The real maps are here.
And more new maps for MIX.
Thanks KaliBwoy.
-
I fixed SH-fuckypower, SHNokebabmap and CTF Summit. Reupload please.
And 1 more new map: SH-KirbySmash
Thanks.
-
I fixed SH-fuckypower, SHNokebabmap and CTF Summit. Reupload please.
And 1 more new map: SH-KirbySmash
Thanks.
-
LoL i don't know what is this bug.
-
Ok, I reuploaded SH-Fuckypower.
And all of NTS-Lucky aren't the same, they have a different gamespeed:
Lucky 1: Gamespeed 1 spawnpoint NRG (bike)
Lucky 2: Gamespeed 0.5 spawnpoint NRG (bike)
Lucky 3: Gamespeed 2 spawnpoint NRG (bike)
Lucky 4: Gamespeed 1 spawnpoint infernus
Lucky 5: Gamespeed 0.5 spawnpoint infernus
Lucky 6: Gamespeed 2 spawnpoint infernus
If u don't want upload all, almost upload 1, 2 and 3 please.
And i uploaded 5 more maps for MIX server. Thanks Kali.
-
-
-
Warp, SH-Mariposa wasn't uploaded, try again pls.
-
No, this maps are the real maps:P
Ty Warp.
-
Warp, I just need to upload these maps. Thanks.
-
-
OK and thx warp.
[CTF] BOOM doesn't uploaded.
I try to upload this maps, i don't know what is this error.
-
Oh and warp, you said uploaded, but CTFboatcapture2.0 and NTSONLYRAILSPRINT weren't uploaded, can you upload again pls? Thx.
The new maps has I said:
-
More new maps for MIX server. Thx warp.
-
New map for RACE server.
-
5 new maps for MIX. Thanks warp.


Fix NTS
in Multi Theft Auto
Posted
Kali, SDK, Ywa... What do you say about that?