Z3ITM4NN
-
Posts
44 -
Joined
-
Last visited
-
Days Won
29


Z3ITM4NN's Achievements
")


-
 Auriz- reacted to a post in a topic:
Missth Moderator Application
Auriz- reacted to a post in a topic:
Missth Moderator Application
-
 missth reacted to a post in a topic:
Missth Moderator Application
missth reacted to a post in a topic:
Missth Moderator Application
-
Accepted Will give u the chance to prove yourself, more info follow on Discord.
- 1 reply
-
- 2
-
-
-

themoroccanjob blocking, joinlag, ve other issues
Z3ITM4NN replied to akLanogLU-'s topic in Processed
Closed - Punishments given. -
r0cK reacted to a post in a topic:
📢 Mr. Green MTA – Staff & Server Update (2024-2025)
-
 Z3ITM4NN reacted to a status update:
XD i got eyes
Z3ITM4NN reacted to a status update:
XD i got eyes
-
Sandro reacted to a post in a topic:
📢 Mr. Green MTA – Staff & Server Update (2024-2025)
-
Mateoryt reacted to a post in a topic:
📢 Mr. Green MTA – Staff & Server Update (2024-2025)
-
Cena reacted to a post in a topic:
📢 Mr. Green MTA – Staff & Server Update (2024-2025)
-
 BoyKa reacted to a post in a topic:
📢 Mr. Green MTA – Staff & Server Update (2024-2025)
BoyKa reacted to a post in a topic:
📢 Mr. Green MTA – Staff & Server Update (2024-2025)
-
Hello Mr. Green Community, This post serves as a minor update and information bulletin regarding the current state of the MTA server, staff structure, events, and reporting procedures. Management Update As of late July 2024, following Nick_026's resignation from the MTA Manager role, I (H$G|Z3ITM4NN) stepped in as MTA Manager, alongside Mateo, who unfortunately stepped down later that year. Since then, I have been serving as the sole MTA Manager. This hasn’t been formally announced on the forum until now, though it has been visible on the Staff Page. Nick_026, or these days known as @VulpyWags, remains active as a Developer, and has continued to significantly support and improve the server in technical and gameplay-related areas. Major Technical & Gameplay Updates Several important changes have taken place: Smooth Vehicle Change Replaced the old “bouncing” vehicle transition with a smooth variant. (Some maps still use the old system for compatibility.) Blocker Mode → Ghost Mode Players marked as blockers in Race/NTS now enter ghost mode instead of being vulnerable to ramming. Marked players also do not receive GC or Toptimes while ghosted. Performance Optimizations Many resources were cleaned and optimized, dramatically reducing loading times and join lag, which is now barely noticeable. New Feature – Progress Map See your current position on a live, checkpoint-connected map layout. Ghost Racing Improvements You can now race against multiple ghosts, not just your PB. Events & Community Interaction Since I joined Mr. Green, I’ve been hosting community events — long before stepping into a management role — and I fully intend to continue them as time allows. Events are typically held on weekends around 18:00–19:00 CEST. You’re always welcome to join, compete, or spectate. I appreciate all suggestions and constructive feedback, especially regarding formats or map picks. To stay updated, be sure to join the Discord server. Current MTA Staff @Z3ITM4NN - Manager @VulpyWags - Developer @Haxardous - Developer @Auriz- - Admin(Mix) @koolaid - Admin(Race) Hitman - Moderator(Mix) Reports, Rules & Behavior Reporting Please report any issues via official channels (Discord or Forum). Avoid sending private messages to admins unless it's a private matter — public reports help speed up the process and ensure all active staff can see and act. Rules (Unchanged, but reinforced) Do not cheat, hack or exploit to get any advantage Do not insult or provoke any player or admins (Don't be toxic) Do not block other players (Ramming isn't blocking) Do not flood or spam the main chat Do not advertise other servers Using someone else's PaintJob without their permission isn't allowed and punishable Do not deliberately lock other people's name or impersonate other people Do not avoid mutes via discord or nickchanges These rules apply in all languages used on the server. Admins will act accordingly to keep the server free of unfair or toxic behavior. Punishment Policy We issue punishments based on: Context and severity of the situation Player history and previous offenses Frequency of rulebreaks Any signs of improvement or willingness to change Even if two cases seem similar on the surface, the punishment may differ depending on the full context. We ask for your understanding and respect in how decisions are made. We are able to track any player/admin actions to ensure fairness within the punishment process Community Reminder We know competitive environments can get intense — but we encourage all players to treat each other with respect, report rulebreakers properly, and avoid escalating conflict. This helps everyone enjoy the game more and keeps the community healthy. Respectful Contact If you have questions about a punishment or want to appeal something, please do it respectfully and through the proper channels. We’re far more likely to help if you approach calmly and reasonably. Final Notes Thanks for continuing to support Mr. Green MTA. We’re a volunteer-run team, always working to keep the server fair, fun, and functional. Your help, reports, and good behavior contribute more than you know. I will always try to respond to any issue, requests or question. I am always happy to help, if u have mapping related questions as well. See you on the server, – Z3ITM4NN MTA Manager
-
- 5
-
-
-
-
F1MADKILLER reacted to a post in a topic:
i am perma banned for just bought a map.
-
You were not permanently banned because of a single incident. The decision was based on your entire history of toxic behavior, including: Repeated, extreme insults (including sexual, racial, and national attacks) Mute evasion and nickname abuse Disrespect toward players and staff This shows a consistent pattern — not one isolated moment. Laca received a warning because his provocation, while not okay, did not come close to the severity or frequency of yours. That’s not a double standard — it’s case-based moderation, and that’s exactly how we apply our rules. You have chosen to continue with bad decisions to prove a point that wasn't there to be proven to begin with. The punishment stands, and there will be no further discussion. We wish you the best elsewhere. Additional: And now, continuing to call an admin "Nazi" will remove any chance of u having a comeback.
-
Since u can't read i will lock the topic. I repeat: Punishments depend on what was done, how serious it was, and the context. U neither consider context or seriousness. Not each insult is valued the same, i didn't do the mute to you so it has nothing to do with only my view. Ur mute will run out tomorrow, ban will too (I will let auriz decide when exactly). Don't insult or attack people and we don't need to talk about the seriousness of such. I wasn't online at the time. U have been actively reported while calming down Weedy was my decision. Considering seriousness and context. As far i remember he didn't fuck up everyone after 30min. Yet u where still doing stuff 1h after your mute (resulted in ban). So a 30min Mute on your end would have been clearly to less. U got punished, broke the rules directly again, and with the wording in this post again. I wouldn't shoot him or escalate the situation. I most likely would either catch up and call the cops or just call the cops if i can identify him. Most of this is your opinion. U have to differ between hating you for your behaviour and blaming it on you being a turk and generally hating on Turks. Considering MTA, there are a lot people of your nation representing your nation bad, i have turkish mates within MTA as well and they hate how a majority of them behaves since due that behaving they get fucked/annoyed/insulted due stereotypes and similar. As a german i can relate to racism in videogames pretty much and in no way i will ever respect it, but as well u don't have to blame everything on racism. Yea totally. Lets go by my logic. I have rechecked the logs and translated what u said again. I highly doubt that none of the following is a insult in your country. (It doesn't matter if something is a insult, it matters what kind of insult it is and (who could have guessed) the context, funny wise if i ask a AI to translate it aswell it warns me "Yes, I can translate these for moderation or documentation purposes. Please note that the content is highly offensive, vulgar, and includes hate speech, explicit sexual threats, and discriminatory language. Here's the direct English translation of each line:") So u wrote: "Let me fuck your mother through her asshole, write this down too." "Let me fuck your ancestors and your flag, write this down too." "Let me tear apart the pussies of your entire family, write this down too." "Stupid sons of whores like you do every kind of filthy thing and then blame us." "Typical Nazi attitudes." (Very racist if u ask me) "Shut up or I’ll cum in your mother’s pussy." "Classic Nazi EU person." "Just provoke everyone, but EU gays are always right." (I don't think being gay is something bad) So i will put a change to Auriz decission. U will be banned till 4th of July and be muted till 27 of July. Have Fun and enjoy the rest.
-
Noone from the Staff gets paid, we can't be bothered to read the chat at all time. We are reading reports and react upon them. Weedy hasn't been reported lately. That 30min mute for weedy was probably to cool him down. Considering your nickchange to insult u needed obviously more then u got. That alone is reason enough to increase your mute time to a week once the ban is lifted (Auriz will do lift the ban at some point). I repeat: Punishments depend on what was done, how serious it was, and the context. "If you attack any person, they will naturally defend themselves. Understand this first. "You did not defend yourself, u escalated the situation beyond what it was. If u understand that under defending yourself u have other serious problems. The insults on your screenshots are after u have overdone it and are by far less worse then what u said. Family will always be a no go. "Dog" is the only one before and that Insult has different meaning all over the world. And its just 1 word. Not a bunch of hateful msgs. If someone honk at you in a car u start ramming him irl? If something racist or not can depend on the view. I think he stereotyped u, which isn't the best either but that is not the topic here. If these are not harmless to you. Okay i will have to readjust the situation. Give laca a 1 day mute and since u used stupid which would be same as "idiot" here too increase yours to a Month (repeated Rulebreak = harder punishment). At this point the "ridiculous" and "nonsense" comes from you.
-
Regarding Laca, he has been warned for the mapset: Given the context, and compared to your own insults, what Laca said was relatively harmless. He has already been punished in the past (e.g., with a mute), so he knows he’s not exempt from consequences. In this specific case, a warning is the appropriate response, a mute or ban would be excessive. Also, it seems there was some provocation from your side beforehand. About your mute: I reviewed the logs and saw serious insults in your own language. Using Turkish doesn’t protect you from the rules, breaking rules is breaking rules no matter the language. In fact, using it to speak behind people’s backs, whether players or admins, makes it worse. You’re lucky the mute came from Auriz and not me. This kind of behaviour is exactly why many servers restrict chat to English. If it continues, I may have to apply that rule on Green as well, so for the sake of your people, please act properly. As for the ban: It was issued for mute evasion. That’s entirely on you. Final note: Escalating situations never helps. It just creates more trouble for everyone involved. If you want to skip a map, the proper way is to tag @mta-admins in the Discord server. Sometimes someone can help ,though not always instantly ,but that’s the right way to react. (Sidenote: U even insult when writing here which doesn't improve your standpoint) And no, we don’t have double standards. Punishments depend on what was done, how serious it was, and the context. We look at each case individually. That’s how it’s always handled.
-
Toptime Hunting Session – Open Event Join the Event Server this Saturday 21. June from 16 to 21 CEST for a dedicated Toptime Hunting Session! Map Purchases: You can buy Race, NTS, and RTF maps during this session. -Maps from other gamemodes will be skipped without refund, so choose carefully! Session Features: Map Replays increased to 10 (default is 3) Cooldown maps (including coremarkers) can be set on request TopTimes will be active QuickRedo, Map Skips, and similar features available on request or majority vote Earn 777 GC for achieving a T1 on any map! Get ready to hunt those records!
-
Results: The Mr.Green Trio AllMode Tournament has come to a end. 1. Slow Speed 2. AoS 2 3. No Name No Clue 4. RS Racers 5. AoS 1 All Stats and Scores: https://docs.google.com/spreadsheets/d/1vmKVzrjtv4ymri1fHXzBoIDUZ_x_bGoNbseqE0qI_UA/edit?usp=sharing
-
missth reacted to a post in a topic:
Missth Moderator application
-
Denied You are back for 6 Weeks and haven't chatted much in the in-game Chat since then. This makes it hard to judge if you are suitable for the position. U don't need to be a Moderator to help out. -If u see or notice issues feel free to mention them. (Use discord for that if possible) -Help other Players Additional Notes: -I will keep your application in mind and contact you if you become suitable for the role of a Moderator
- 1 reply
-
- 1
-
-
F1MADKILLER reacted to a post in a topic:
F1MADKILLER! - Admin complaint (+ Discord Unban Request)
-
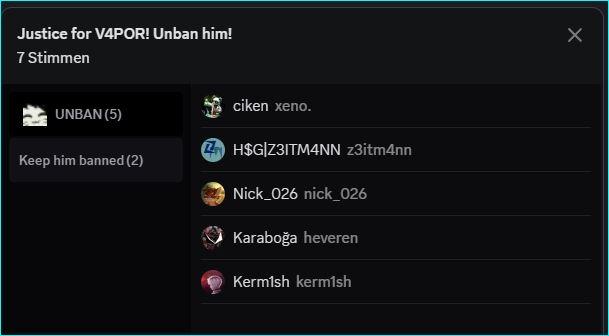
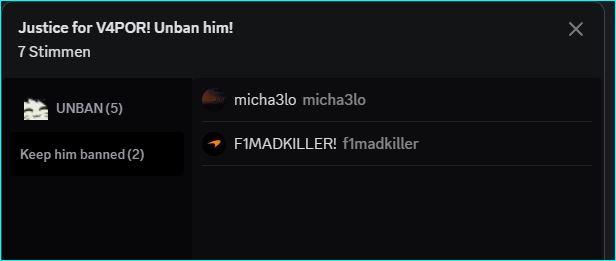
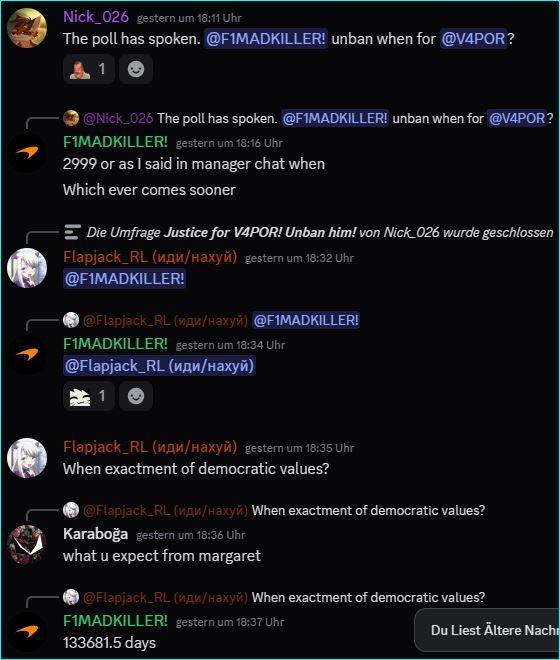
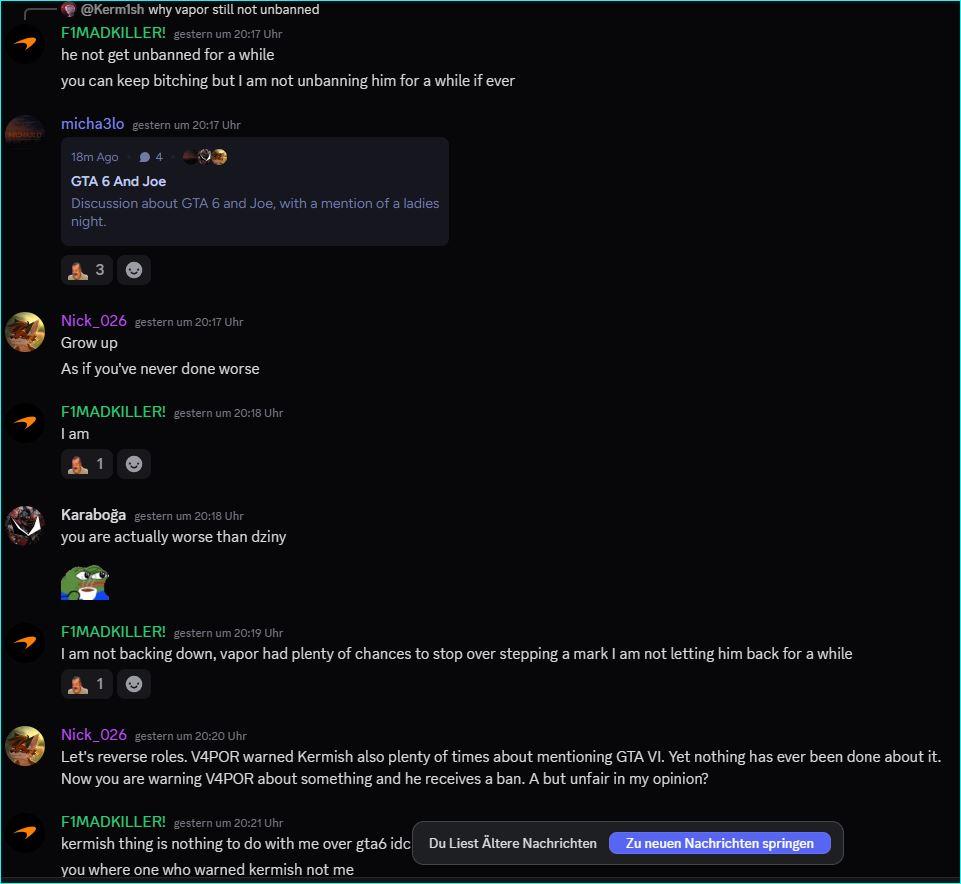
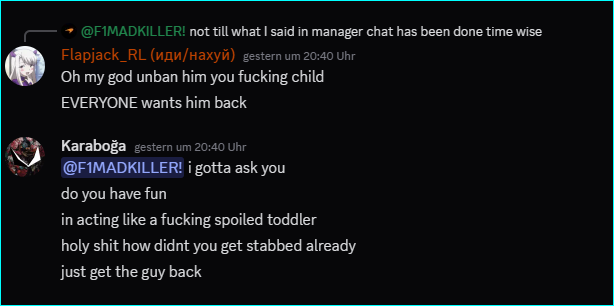
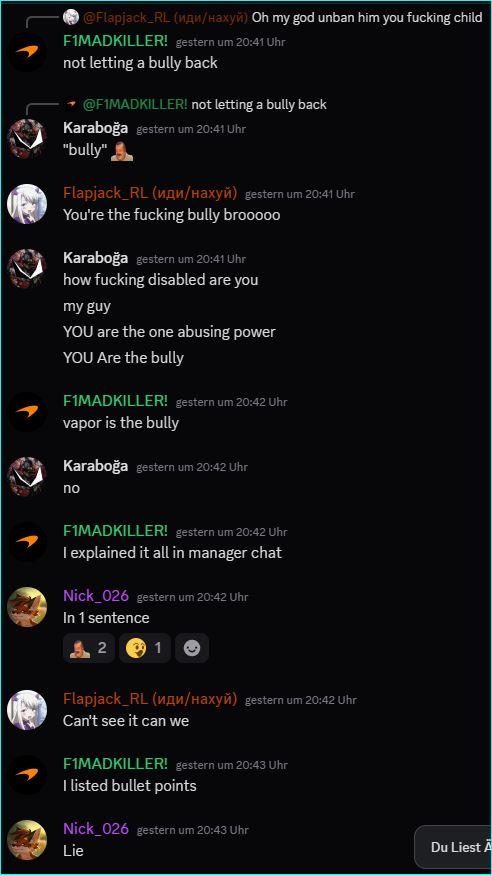
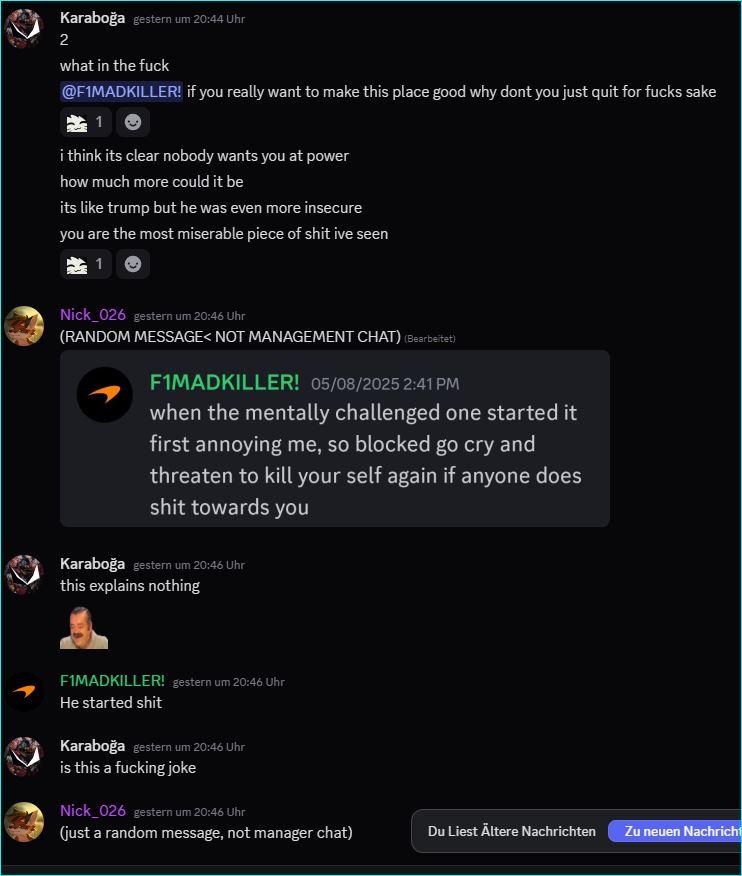
A little pov and a few additional Msgs from the Discord #offtopic channel in which the ban happened. First of all i will not do any statement regarding the part that includes me. I would directly unban you if the Ban wouldn't have been made by another Manager, but i am supporting the Unban Request in any way. I was previously more active (not anymore) in the offtopic channel which generally is a mix of shit-posting, arguing, roleplay, status/life updates, techtalk and a damn lot of trolling. In my opinion everyone there should be treated the same. Most of the Chatters there got trolled or have trolled, so as of me i don't see a reason to ban nor mute V4POR or any of the others for such. As for the "trying to talk like me" i seen that in various variations before too, not a issue until now. I would consider that a troll as max as for a Impersonation or similar he would have changed his nick to said Admin/Manager, which is not the case. Generally i see no reason to ban People on our discord if they are posting within the discord TOS. If they break our Rules a Mute will be enough. There are certain tough cases which V4POR isn't. (My Opinion as Person not as Manager of MTA) All following Screenshoots will be out of the public #Offtopic channel i will not share any disclosed information from the Manager chat or PMs about this topic. I share this since it shows that there is support for this Unban Request and as well in some cases Support for other parts of the complaint. Vapor can't provide these Screenshoots since he is banned. Additional i don't support the insults towards anyone on these screenshots. (Gestern=Yesterday, context of the timespan from the msgs) A Vote that happend and went for 24hs not long after V4POR got banned. (started by Nick_026. That represents very well a good part of the Offtopic Chatters even some that argued with V4POR voted in favour of him. The Response toward the Result: Another Reaction since Kerm1sh asked "why vapor still not unbanned" (the part covered by the discord thing on the bottem says "idc about that") following Msgs: I think that in this case you @F1MADKILLER can't see clear about the situation at hand since your taking it too Personal. Since a Admin 2x Managers and a Dev are in favour of a Unban i am asking you to Unban him.

-
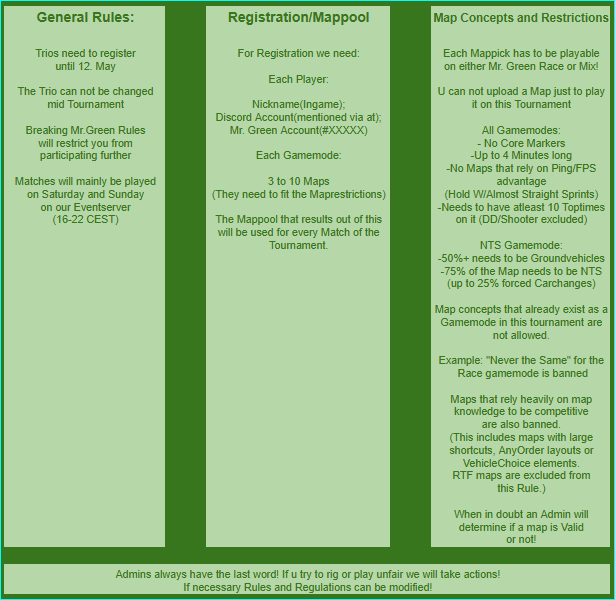
At 17. May 2025 it will start! Similar to the Duo Tournament in the Past we will matchup in all the Gamemodes Mr.Green has to offer! U have to register your Trio till 12. May 2025 16 CEST Registration: Mr. Green Discord #mta-general Thread: Registration for the Trio AllMode Tournament Discussion or Questions: Mr. Green Discord #mta-general Thread: Discussion Trio AllMode Tournament More info below or at: https://docs.google.com/spreadsheets/d/1vmKVzrjtv4ymri1fHXzBoIDUZ_x_bGoNbseqE0qI_UA/edit?usp=sharing
- 1 reply
-
- 2
-
-
-
The first edition of Beat the Mapper Developer will be played on Race Maps. Can u beat Nick_026 on Z3ITM4NNs Maps in just 5 Attempts? Nicks Toptimes are set as Maptime, which only allows u to finish if u beat his time (or in rare cases have a lucky so close time that the timer let u finish still). Format: 10 Maps (1min-1min 30 Seconds) will be played 5 times each. One break before Map 6. Every time u finish u gain 1 Point, Position on each map does not matter aslong u finish. Most Finishes=Winner. -Date: 19 CEST -Server: MrGreen Event Server -Duration: 60-90 Min -For Rewards u need a MrGreen Login. Rewards: 1st: 5000 gc and 5 days vip 2nd: 3000 gc and 3 days vip 3rd: 1.000 gc and 1 days vip Additional: 1000 GC for every 10 Points u got. (Total Possible Points=50)
-
- 1 reply
-
- 1
-